
Free at Last
Free Me
Part I
Notes from a conversation with Joe Turner.
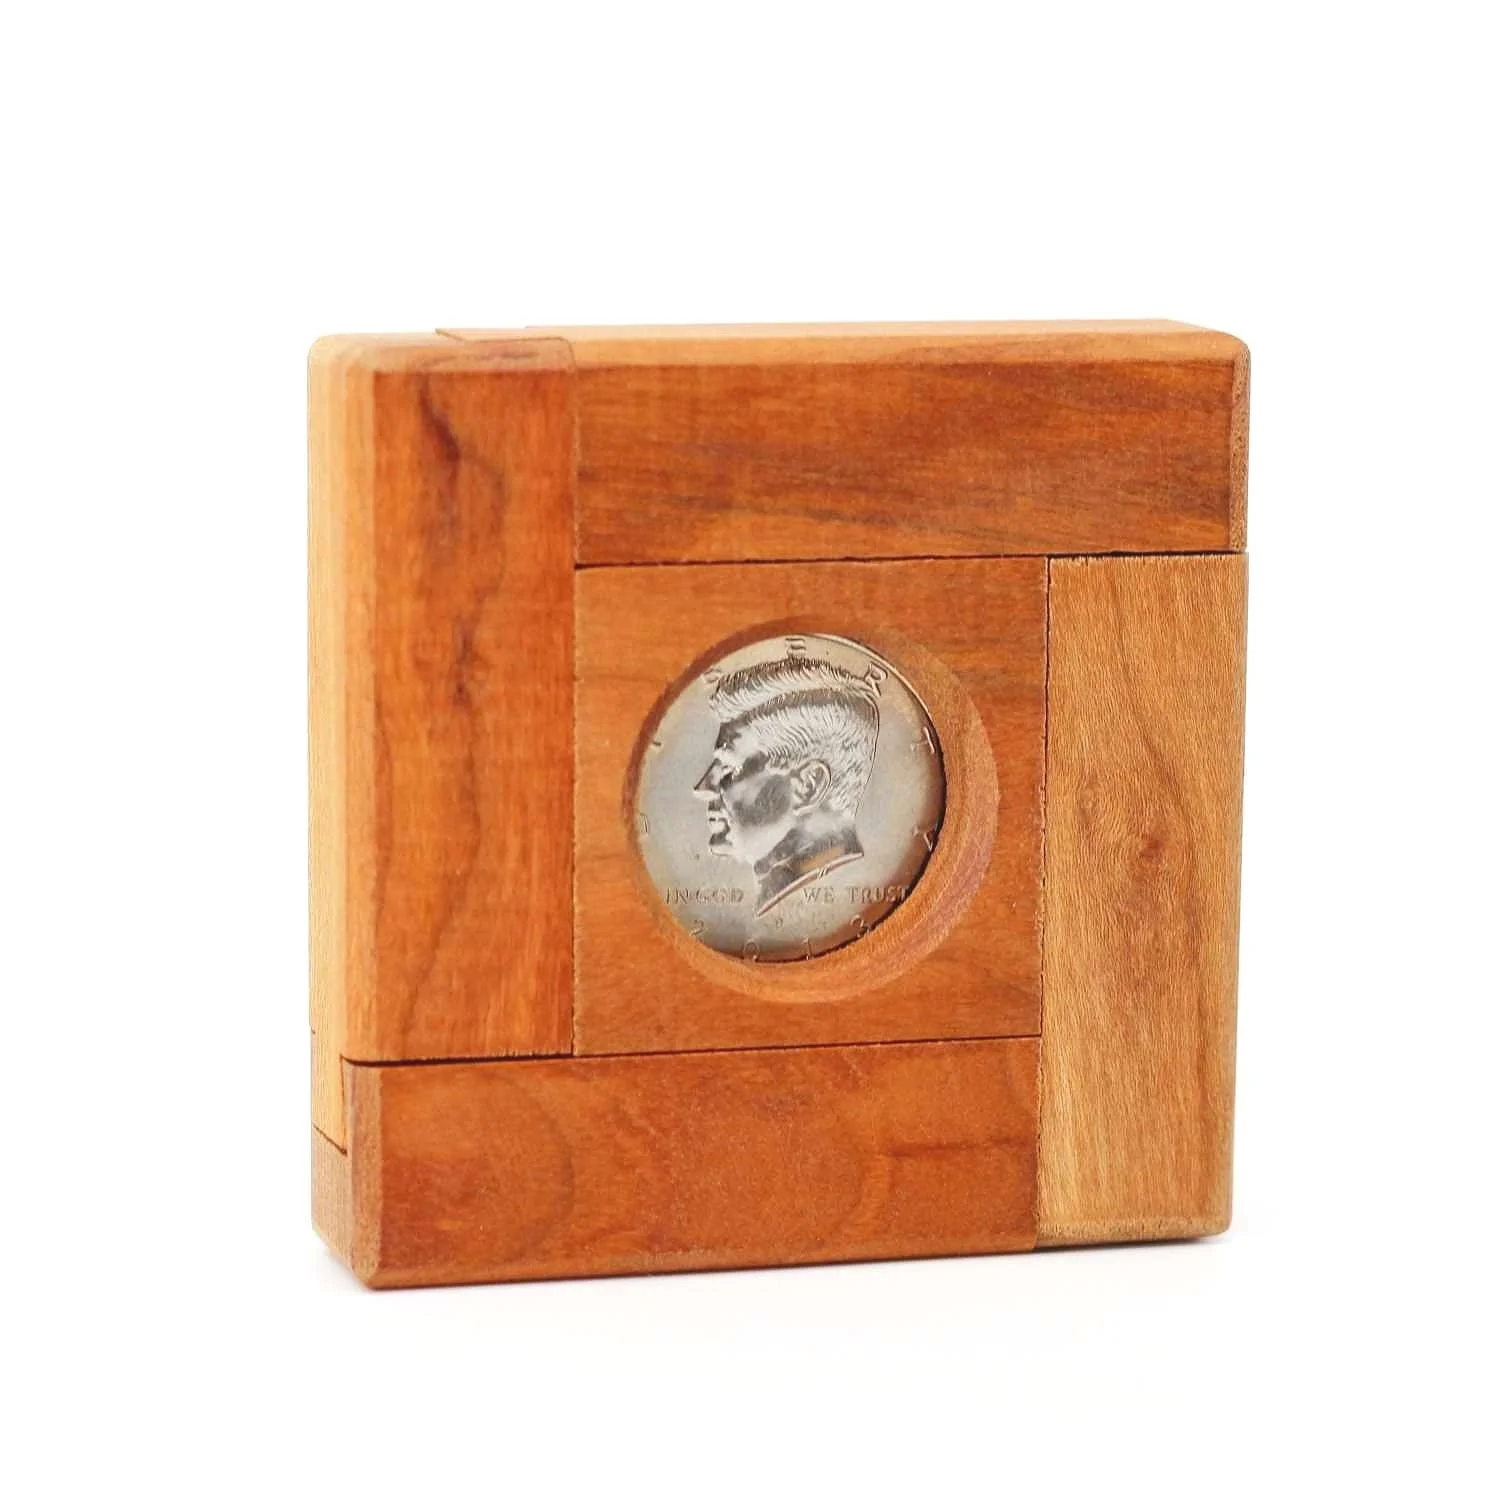
Joe Turner’s coin release puzzle, “Free Me”, was designed in 2003, with no plans at that time to make a series (which is why it is not number “1”). Joe recalls getting inspired by a set of woodworking books by Edwin M Wyatt called Puzzles in Wood and Wonders in Wood, and surprisingly sold by Lee Valley Tools. There he saw puzzles with dovetails, and thought that would be nice to try. Those familiar with his creations will not be surprised to learn that he set out to make 1 puzzle which contained a few separate challenges which are connected. This was realized in Free Me as three distinct puzzle sections which could each stand on their own, combined in the whole coin release. Joe doesn’t recall what it was, exactly, in those original books that triggered the full puzzle, other than perhaps the idea to combine the many elements together.

Free Me by Joe Turner
Joe originally envisioned trapping an Eisenhower silver dollar in the puzzle, thanks to a set of fifteen such coins he got from his brother. But these were hard to source on a larger scale, and expensive, and Joe is always mindful of the cost for a puzzle (another part of the puzzle, so to speak, is the puzzle of how to make things efficiently and economically). His siblings each got one of these silver dollar Free Me’s, but for the rest that he made, (the “friends and extras”) he used Kennedy half dollars. Rather than have two versions of the name (Free Eisenhower, Free Kennedy – which sounded off anyway …) he settled on the ubiquitous, Free Me.

Free Me 2 by Joe Turner
Joe never thought he would continue this theme, but was nonetheless not satisfied with a few details that came to light after the production. He had not enlisted many “testers”, which was another step in the learning process, he learned, so that after the puzzles were already complete, his son “smacked” one, and found an unintended solution. Joe did a mock up with some pins to fix this, but decided it was not ideal. Joe modified the original Free Me design, adding an extra section and a more elegant solution to the unintended step his son had discovered which did away with the undesirable pins. He made a few of these to “redeem” himself. Like many puzzle makers, and solvers, Joe doesn’t like a mechanism that won’t work reliably most of the time, and will spend long hours solving these types of “design puzzles”. He also felt that the dovetails on the original Free Me were too loose, and not of the quality he expected for something he would sell (and he never sold many of these). His dovetail making skills improved over time, through trial and error, tweaks, and perseverance. A few years later, he had found John Rausch’s website and learned about the International Puzzle Design Competition. He thought, why not? He entered the updated puzzle, with its four puzzles in one, and named it Free Me 2.
Free Me 3 by Joe Turner
Ten years after the original Free Me, Joe had a new idea for the series, the Free Me 3. He envisioned a square coin release puzzle with a dovetail on each side such that it would appear to have been impossible to construct – an “impossible object”. His sister proclaimed it was indeed impossible to solve. Joe tried to convince her that if it could not be taken apart, it likewise could not have been put together … but he remains unsure if she ever solved it from such a cryptic hint. Like all of his puzzles, these were made to be given as Christmas gifts to his family of many siblings, which now included nieces and nephews as well. Joe notes the challenge of getting the tolerances for this puzzle correct, so it was not too snug, not too loose. In the end he felt the four dovetails were a little looser than he hoped, but the puzzle works well and as intended. He learned a lot about making jigs, and planning production efficiencies. He got a bit lucky in that he planned everything out and built the components before ever making a prototype, and the finished product still needed some tweaking to make it more stable. But he accomplished this with a final part he could add, and adjust, as he discovered how things were being effected by humidity, and the balance of tolerance in the dovetails. The learning process continued.

Free Me 4 by Joe Turner
Free Me 4, completed in 2014, was inspired by a larger puzzle Joe had seen online, which featured a few ideas that he liked and thought had potential, but were far too easy. Of course, he would make something completely different, and much more challenging. He decided to shrink the puzzle, and add the requisite hole on top through which to view the trapped coin. Just like before, he built the whole puzzle without ever making an initial prototype, because he was sure “it should work”. The puzzle contains some very precisely placed parts that need to be “just right” and requires a few tiny springs in the mechanism, without giving away too much. Joe estimated he would need about 800 of these springs in total for this production run, and duly went online in search of them. He found something that would work, for $6 per spring … Joe tells this story to illustrate how he manages costs and solves production puzzles. Even at $1 per spring, if purchased in excess bulk, they would have been too much. How did he solve this problem? He went to You Tube, and learned how to make his own springs. With some .8mm music wire, a ¼ inch rod, a jig, a wire cutter, and a drill, he was off to the races making perfect 3/8 inch springs. The ultimate cost was just 5 cents per spring, and he has used this method ever since in all subsequent puzzles.

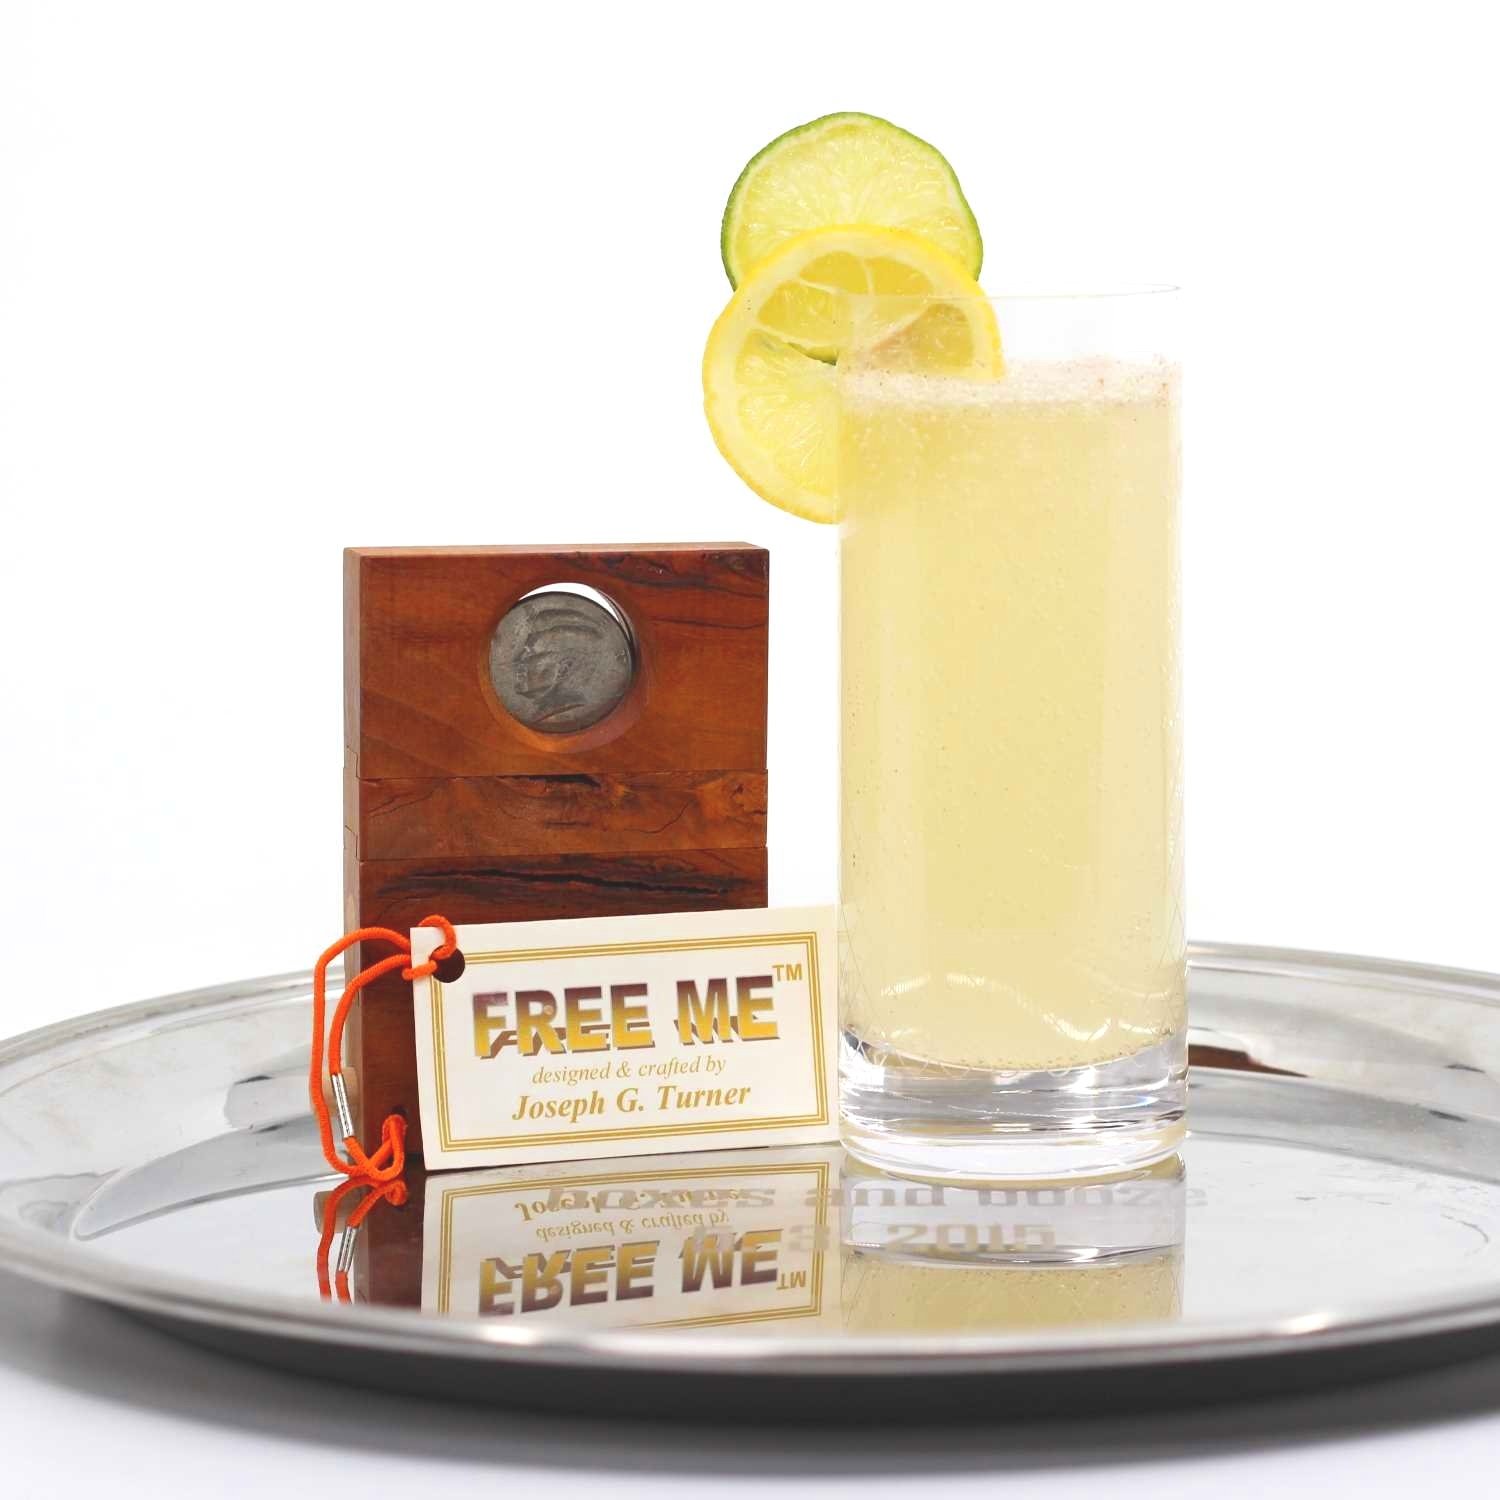
Sweet Relief by Natasha David
Here’s a little relief from these complex conundrums, because although they propose the goal of being free, you will pay the puzzling price! And not just any relief – “sweet relief”! For the Free Me coin release series I thought it would be appropriate to offer something actually free – alcohol free, that is. I often get asked about non-alcoholic cocktails, and have featured a whole series of these over the years that I often refer to as “unlocked” cocktails, since I usually pair them with a puzzle lock. In the cocktail industry there are many different names for these delicious drinks, and some of my favorites are “zero-proof”, and the ultimate clever name, “free spirited” cocktails.

Sure to provide some sweet relief
Award winning bartender Natasha David is well known for her creative spirit free drinks, and has recently published an entire cocktail book dedicated to these and to other low alcohol content drinks called “Drink Lightly”. Her “Sweet Relief” cocktail has a decadent burst of bright citrus thanks to a homemade salted lemon-lime cordial, which is made with fresh squeezed juices, cane sugar, salt, and plenty of zest. To that is added a touch of cinnamon syrup. A curry leaf (or kaffir lime, or other punchy herbal leaf if you have it) is muddled up with these and shaken with ice, and everything is topped up with tonic water. The extra touches, attention to detail and care in preparation add up to much more than a soda – this is a cocktail, make no mistake! Here’s to freeing ourselves from conventions, routines, and expectations, and finding sweet relief. Cheers!
Free advice
Sweet Relief by Natasha David
2 oz salted lemon-lime cordial
½ oz cinnamon syrup
Curry leaf
Tonic
Shake first three ingredients with ice and strain into a highball glass with ice. Top up with tonic and garnish with a lemon and lime wheel.
Stay tuned for the rest of the series next week …
and in the meantime, stay sharp: